StrandVision Digital Signage
715-235-SIGN (7446) | www.StrandVision.com
- Home
- Digital Signage
- Package Options
- Pricing Matrix
- StrandVision Digital Signage R390 Linux Digital Media Player
StrandVision Digital Signage R390 Linux Digital Media Player
A low cost preconfigured Linux Digital Media Player Appliance for StrandVision Digital Signage…
StrandVision Digital Signage is pleased to offer our R390 pre-configured Linux digital media player appliance. This linux digital signage hardware component is compact, powerful and allows for playback of your StrandVision Digital Signage content in minutes with plug and play connectivity to the StrandVision Digital Signage network.


- Intel 10th generation I3-10100 quad core 3.6Ghz
- Intel H410 Express Chipset
- Cooling system with 2 fans
- Operating Temperature: 32°F - 122°F (0°C - 50°C)
- 4GB DDR4-2666 SO-DIMM
- 120GB+ SSD Drive
- SATA 6.0Gb/s Interface
- HDMI 2.0 + DisplayPort, Dual video output with 4K playback
- Ubuntu 22 LTS Linux preconfigured for StrandVision Player Software System
- USB Front: 2x USB 2.0, 2x USB 3.2
- USB Rear: 2x USB 2.0 Ports, 2x USB 3.2
- 2x Audio Front (Line out and microphone)
- Realtek ALC662 High Definition Audio
- SD card reader front
- Dual Gigabit LAN (RJ45) Rear, supports WOL, PXE
- 2x COM Ports Rear (RS232 + RS232/RS422/RS485)
- Rear connector for external power button
- 1 Wireless a/g/n Lan
- 90 Watt External Fanless Power Supply (19V at 4.74A)
- 1 Year Parts and Labor Warranty - Return to Depot, 3 year for $89.99
- VESA 75/100mm mounting hardware included
- 24Hr Stress Test
- 7.5 x 6.375 x 1.81 inches (LWH)
- 190 x 165 x 43 mm (LWH)
- 3.1 lbs (5.8lbs with packaging and attachments)
Pricing and Options
- R390 HD Linux Player ($949.99)
- Additional 2 year warranty ($89.99)
Mounting Details
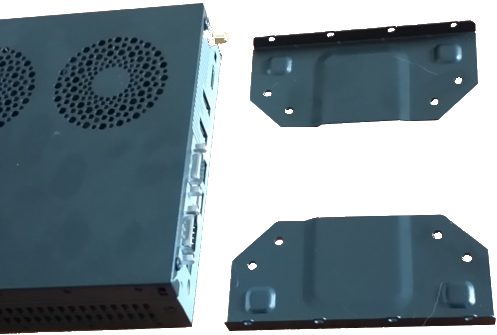
The VESA 75 / 100 mounting plates are attached to the back of a free-standing monitor or to a wall. Since the pc is only 3.1 pounds, two diagonal screws is enough to securly hold it. If the screen (or wall mount) has two screws that happen to match up with the VESA 75 or VESA 100 holes, you could attach it there as well.
This photo shows the VESA plates in the approximate position before mounting. With the mount in place, the pc will stand about 2" in height, so if mounting behind a screen, be sure NOT to get a low profile wall mount.

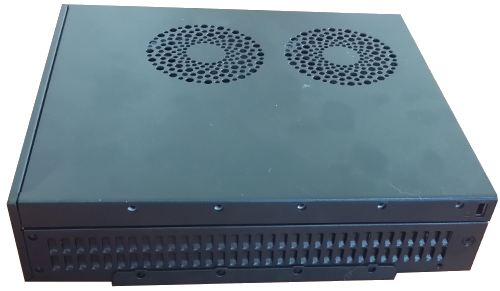
This photo shows the pc mostly in place (see the very bottom) and ready to be secured with the include thumb screws. The screws go into any of the holes you see on the top or the same holes on the bottom.
